Wednesday, 18 October 2023

Glencoe - The Game


Turn 1 and both British brigades failed their Command die test but the Boers had no such problems and immediately opened up with the Long Tom.
The result was a spectacular hit on the Royal Irish Fusiliers that brought down 5 men.
No worries, I ordered the British artillery to reply, except that due to my brilliant generalship I had deployed them 1" short of the maximum range they needed to return fire on the Long Tom! Cries of 'bring up the limbers' rang out.
Hamilton's brigade finally move forward but start to take casualties due to some very jammy die rolls for the Boers.
The view from behind One Tree Hill at the end of turn 2. Both British brigades are now on the move.
The Boer Krupp gun springs into action while the Long Tom is reloading.
The British artillery try to correct their mistake by moving forward and while doing so, the 53rd battery take a hit from the Long Tom. Fortunately this only resulted in the loss of two guns.
Hamilton's lead brigade, the King's Liverpool's, continue to take substantial casualties and by now have two PINs slowing their advance to a mere 2".
The position of the British infantry at the end of turn 3. They are advancing but the boys are beginning to drop like flies.
The Boers on the other hand are yet to lose a single man. The German Corps on the right of the line have extended to bring more fire power to bear.
Ah, that seems to be the end of the Royal Irish. Damn those Boer dice rolls!
By the end of turn 4 the Boers are sitting pretty enjoying something of a turkey shoot (did they have turkeys in 19c South Africa?).
The King's Liverpool's have accumulated 3 PINs so can neither move or shoot this also forces them to go prone (blue marker). All their officers have been hit too!
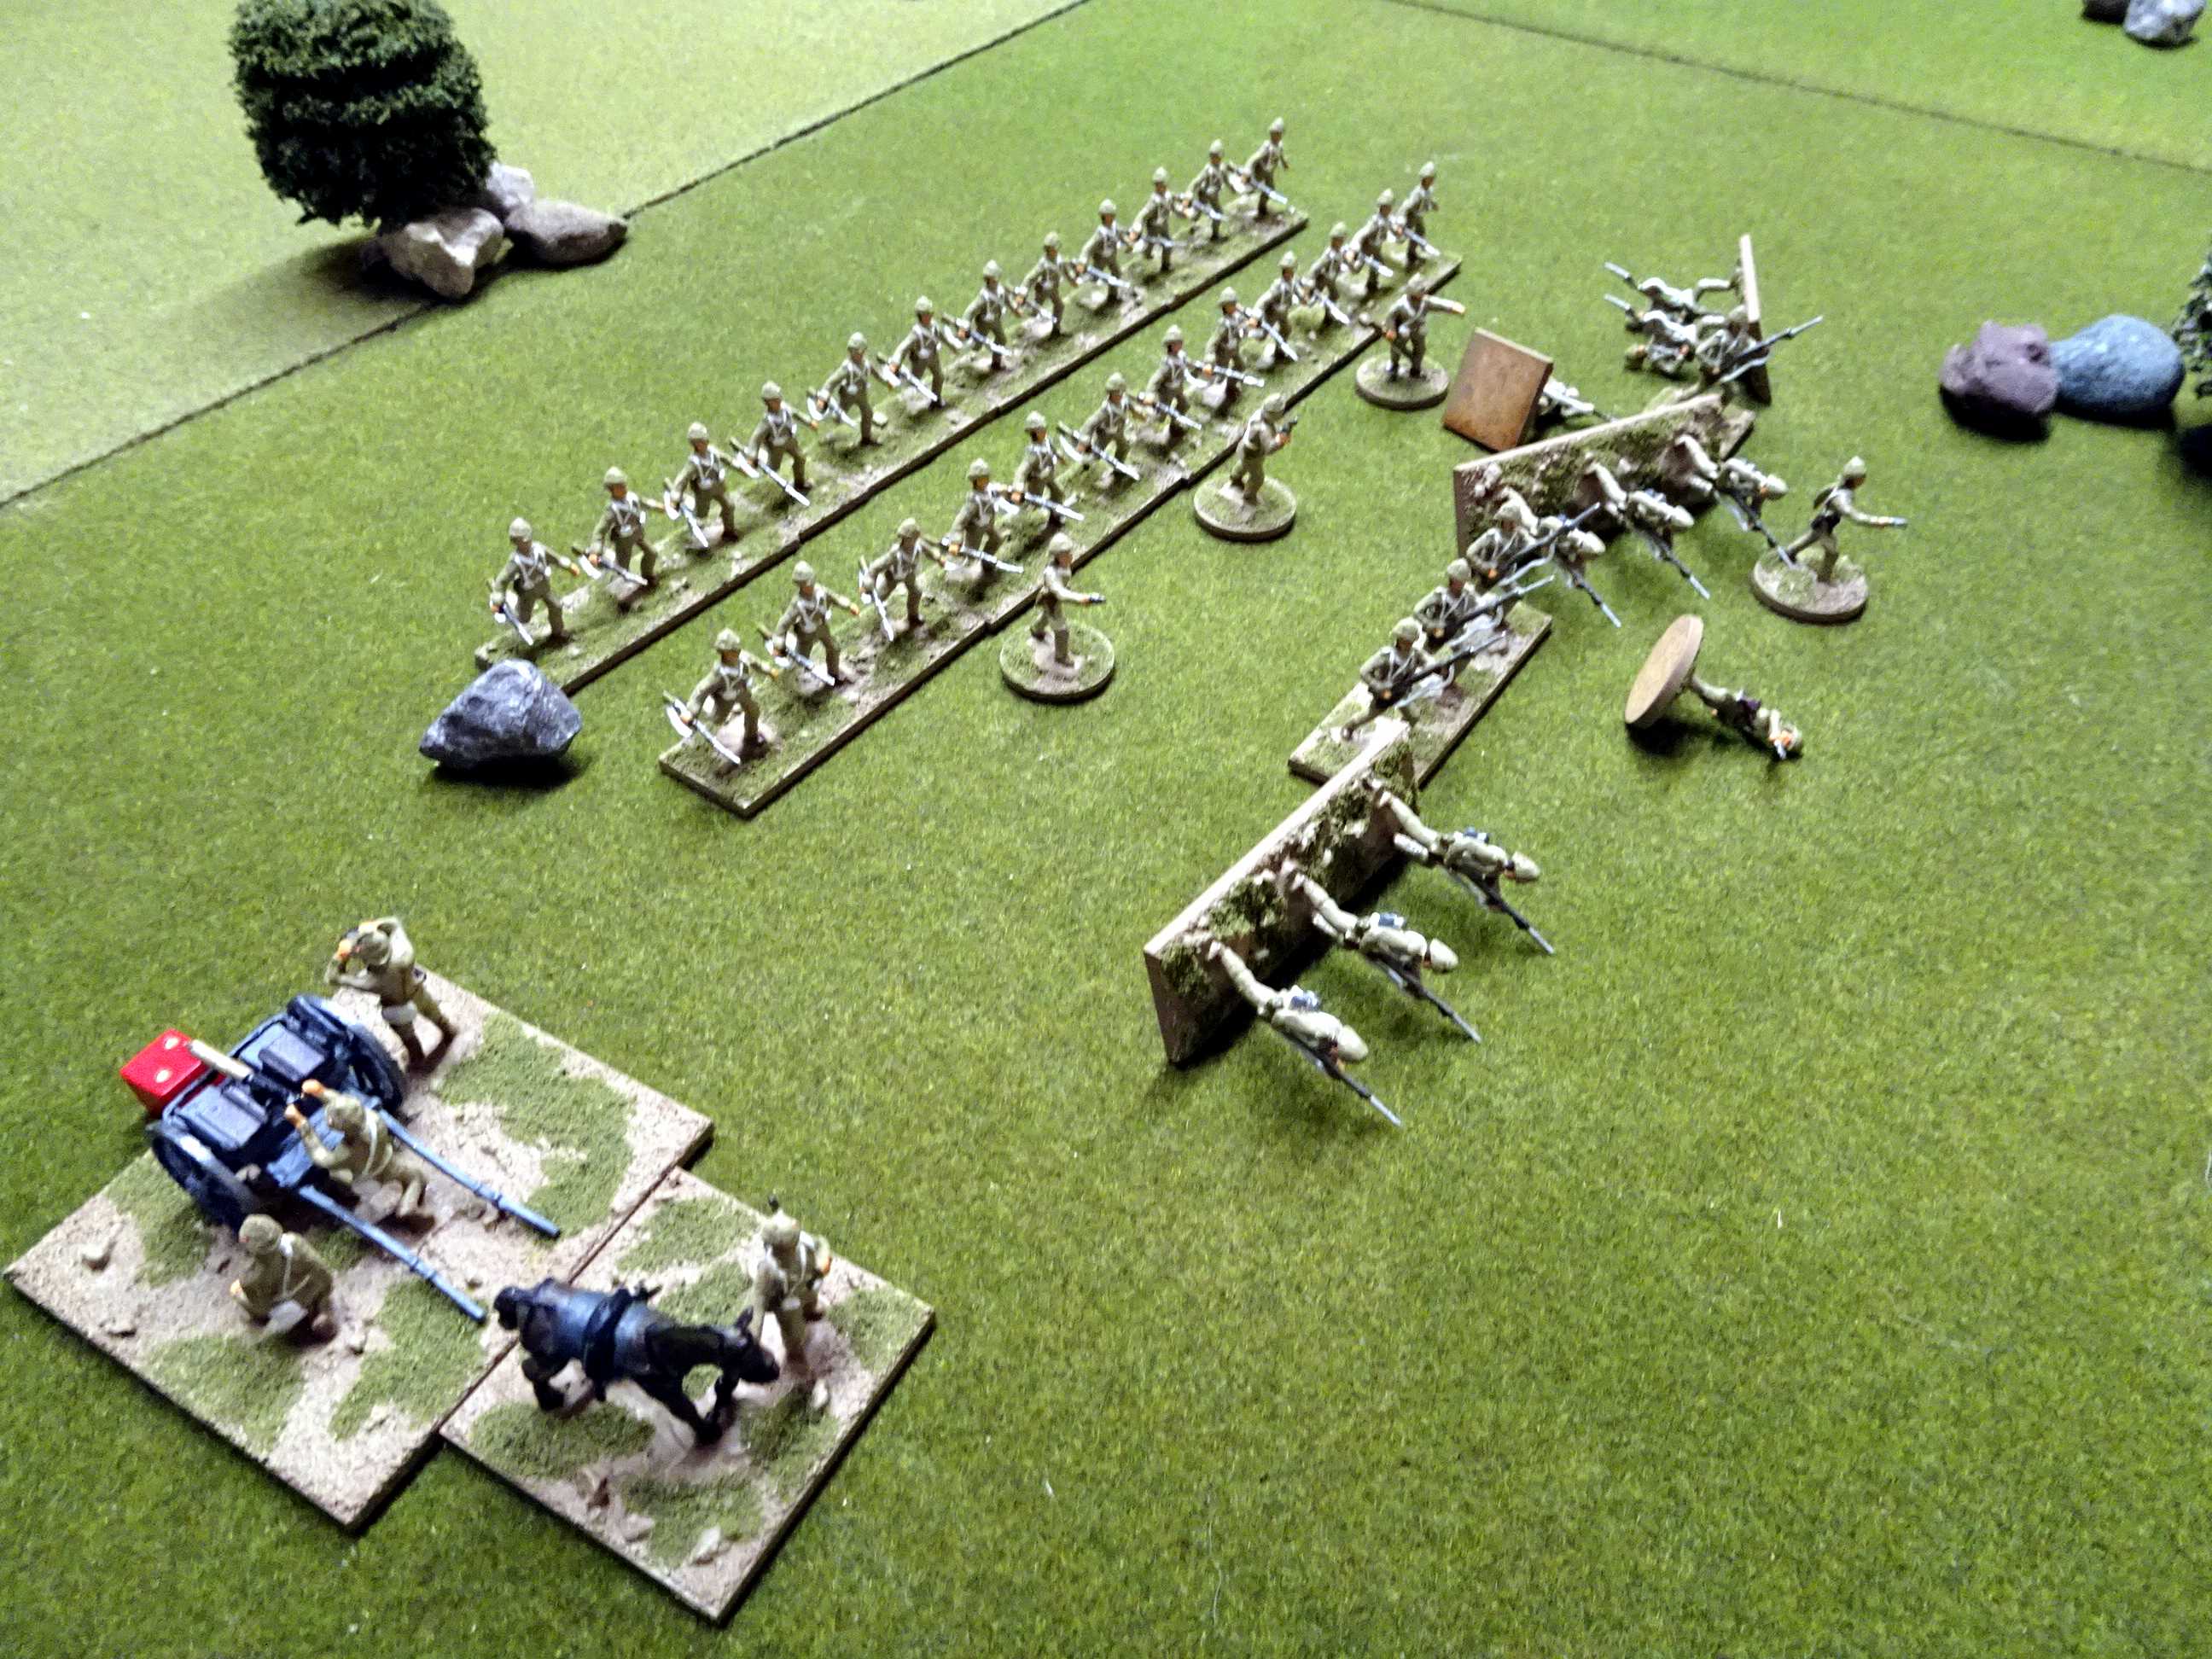
The Gloucestershire's are moving up behind them while their supporting Maxim is about to go into action.
Things are looking impossible on the British right so I order the King's Royal Rifles to extend their line and lie down.
Everything now hinges on the Gloucestershire's as they pass through the ranks of the Liverpool's in an effort to get within charging distance of the Boer line. They receive devastating short range fire from the Mausers and Pom Pom collecting 2 PINs for their trouble. The British casualties have now exceed 48 figures so the game is called for the Boers. 
This is a pity as the Boers are just starting to show some shaky morale in places with a steady drip of burghers heading for home. 
And finally a few casualties as well.
But the day belongs to 'Long Tom' who thoroughly messed things up for the British.
The table at the end of turn 5 - the British attack has run out of steam. Yule orders the army to retire to Dundee.

The game turned out to be a bit of a shambles for the British and although I can partly blame this on some shocking die rolls, I have to take responsibility for some poor generalship too! My decision to move the artillery forward meant that they didn't fire a shot until turn 4. In reality the Long Tom was not all that effective (it only fires every other turn) but that initial lucky shot got me rattled. The guns could have fired on the Boer infantry from their initial position forcing tests for 'first time under fire' which would have weakened their line and possibly caused at least one Commando to flee.

The casualties for the action were as follows:


Next I need to roll for casualty recovery and then see how the outcome of the battle will effect the campaign.

Sunday, 15 October 2023

Battle of Glencoe - Scenario

General Yule is more than a little alarmed that the Boers have suddenly appeared in his rear cutting his line of communication to Ladysmith. However, he consoles himself by thinking that they are just a rag-tag of farmers and will surely disperse at the first sight of British cold steel.

The Boers have occupied two Kopje's near Glencoe overlooking the railway line to Ladysmith and he determines to oust them and restore communications. An immediate attack is to be made at first light on the morning of 20 October 1899.

Kock's command have occupied One Tree Hill.
Yule has his men lined up nice and tidy in close order.

The battlefield - zoom in for a good look.
Overview of the table from behind the British lines.

Special Rules

1. Poor British field craft - Only Hamilton's Brigade may operate in extended order.
2. Officers displaying signs of rank - British Officers will become casualties from Boer rifle fire on a die roll of 1, 2 or 3.
3. First time under fire - Roll 1 D6 for each Commando the first time it comes under shrapnel fire, the result is the number of Boers who panic and flee.
4. Brigade Activation - each British brigade must pass a Command die roll to commence advancing. Add 1 to the die roll for each turn they have previously failed to pass the test.

The Boers have a Long Tom - ouch!
Hamilton's men have sensibly adopted extended order.

Order of Battle

British
C-in-C Brigadier-General James Yule
1st Royal Irish Fusiliers
1st King's Royal Rifles
53rd Field Artillery
1 x Maxim Gun
Colonel Ian Hamilton
1st King's Liverpool Regiment
1st Gloucestershire Regiment
69th Field Artillery
1 x Maxim Gun

Transvaal Boers
C-in-C General Piet Joubert
Pretoria Commando
Krugersdorp Commando
1 x Long Tom Gun
1 x Krupp Field Gun
1 x Pom Pom
General Johannes Kock
Johannesburg Corps
German Corps

Victory Conditions
To win the British must force two of the Boer Commandos to flee the field. The British will lose if they receive more than 48 infantry casualties (50%).

Friday, 6 October 2023

19 October 1899 - Turn 2

Intelligence

Boers - successfully passed their die roll and located all the British forces.
British - no Boer forces detected this turn.

Orders

Boers - no new orders issued this turn.
British - no new orders issued this turn.

Both sides continue with their current orders.

Joubert's Boers are on the march - nice to see which side the French are supporting!

Movement

Yule failed his Command die roll and remains in Dundee.
Symons failed his Command die roll so will not attempt to build any defences at Helpmakaar.

Joubert moved a full 3 hexes to Glencoe
Meyer moved 2 hexes crossing Landman's Drift to hex 1605
De Wet failed his Command die roll again(!) and remains at hex 0105
Botha moved a full 3 hexes to hex 0506

The situation at the end of turn 2

We have our first contact of the campaign between Joubert's forces at Glencoe and Yule's forces at Dundee. I drew up the following list of possibilities to be decided by a D6.

1 or 2 = Yule orders Hamilton to make an immediate frontal attack on the Boers at Glencoe. After the first game turn dice each subsequent turn for the arrival of Yule's Brigade on the British table edge on a roll of 5 or 6.
3 or 4 = Yule orders an immediate frontal attack on the Boers at Glencoe with both his Brigades.
5 = Yule orders Hamilton to make a flanking attack on the Boers at Glencoe while his own Brigade fixes their front.
6 = Yule remains at Dundee and starts to prepare defences.

The result was a throw of 4 so there will be a battle with Yule using both his brigades in a frontal assault on the Boers at Glencoe.

It may be a couple of weeks before I can play the game but I'll post on it as soon as possible.

Rule Amendment - It turns out Rob was right that the orders system is a bit harsh on the British so I'm adding the following modifier to the Command die roll:

+1 to the die roll if the same order failed to transmit/receive in the last turn.

Wednesday, 4 October 2023

18 October 1899 - Turn 1

Initial Orders

White - The garrison at Ladysmith will remain in place.
Yule & Hamilton - You are to withdraw your force along the line of the railway from Dundee to Ladysmith.
Symons & French - Remain in Helpmakaar and prepare to defend the town.

Joubert & Kock - Advance along the line of the railway and engage and destroy the British force at Dundee.
Meyer - Cross the Buffalo River via Landman's Drift then move east of the Biggarsberg Mountains to threaten the British force at Helpmakaar.
De Wet- Advance and secure Harrismith.
Botha - Move to Harrismith and join forces with De Wet.

As these are the initial orders I have assumed that they have been successfully issued without the requirement of a Command die roll. However, all independent forces (those not under the direct control of the C-in-C) must still pass a Command die roll to act on the orders received.

General White at Ladysmith getting slightly nervous.

Movement

Yule failed his Command die roll and therefore remains in Dundee.
Symons failed his Command die roll so will not attempt to build any defences at Helpmakaar.

Joubert moved a full 3 hexes to Ingagne.
Meyer moved only 1 hex and is now at Islandwana (hex 1804)
De Wet failed his Command die roll (he rolled a 1) and remains at hex 0105.
Botha moved 2 hexes along the road to hex 0503

The situation at the end of Turn 1

So it's already a bit nerve racking at General Whites HQ as the Boers bear down on Yule while he fails to act on his orders and retire, although technically White doesn't know this yet!

Sunday, 1 October 2023

Natal Campaign Rules


Intelligence
The Boers have full knowledge of the British strength and deployments unless, at the start of a turn, they roll a 1 in which case they may only act on the previous information received. The British must dice each turn to see what intelligence reports they receive. Roll 1 D6 for each separate Boer map force:

1, 2 or 3 = enemy not detected
4 = enemy is detected but no information available on direction of movement
5 = enemy location and direction of movement reported
6 = enemy location, direction and strength reported
 
+1 to the die roll if the enemy force was detected in the previous turn.
-1 to the die roll if the British troops closest to the Boer force are led by a C rated commander.


Orders
Initial orders for each force are issued at the start of the campaign in line with the strategy that is being followed. To send new orders in response to intelligence received the C-in-C must pass a command die roll. To receive the new orders the commander in receipt must also pass a command die roll to implement them.

The British command die roll required is 4, 5 or 6. Add one to the die roll if the commander is A rated and minus one if he is C rated.

The Boer command die roll required is 3, 4, 5 or 6. Add one to the die roll if the commander is A rated and minus one if he is C rated.

 A rated commanders may use their own initiative and change their orders without waiting for new orders from the C-in-C although they still need to pass a command die roll.

Movement

Boer Forces – die roll 1 = 1 hex, 2 or 3 = 2 hex, 4, 5 or 6 = 3 hex
British Forces – marching along railway line die roll 1 = no movement, 2 or 3 = 1 hex, 4 or 5 = 2 hex, 6 = 3 hex
British Forces – marching along road die roll 1 or 2 = no movement, 3, 4 or 5, = 1 hex, 6 = 2 hex
British Forces – marching in open country die roll 1, 2 or 3 = no movement, 4, 5 or 6 = 1 hex

No forces may enter a hex containing high ground except where it is crossed by a road or railway.
No forces may cross a river except where one is crossed by a road or railway.

Railway Movement
Only British forces may move by rail. Half a battalion or one gun battery may be moved anywhere along the line on a die roll of 4, 5 or 6 (5 or 6 if Ladysmith is under siege). If Boer forces block the line movement must stop at the preceding station.

Battles
When a contact occurs, make a list (1 to 6) of possible actions, and use a D6 to decide which of them is taken. Any resulting battle will then be fought on the table top. After the battle I’ll use the same system to decide how the result affects subsequent actions of both sides.

Only A rated British commanders may operate troops in extended order.


Sieges
Any British force occupying a town, that finds itself with a Boer force in contact to its front and rear, is under siege. To break a siege the British must defeat one of the besieging Boer forces in battle. Trains cannot travel to, from or through a besieged town.

Leader Ratings

C-in-C Lieutenant-General Sir George White (C)
Lieutenant-General Sir William Penn Symons (C)
Major-General French (A)
Brigadier-General James Yule (B)
Colonel Ian Hamilton (A)

C-in-C General Piet Joubert (B)
2i/c General Daniel Erasmus (B)
General Lucas Meyer (B)
General Johannes Kock (C)
General Louis Botha (A)
General Christiaan Rudolph De Wet (A)


Recovery after Battle
After each engagement casualties are restored by rolling 1 D6 per lost figure as follows:

British Troops – 4, 5 or 6
British troops routed off table or otherwise removed – 3, 4, 5, or 6
British Officers – 3, 4, 5 or 6
British Artillery – automatically restored to full strength
Boers – 4, 5 or 6
Boers who fled – 3, 4, 5 or 6
Boer Officers – automatically restored
Boer Artillery – 3, 4, 5, or 6

Following recovery units may be amalgamated to bring them up to full strength but such units may never exceed their original full strength and any extra figures are discarded. Where two Boer Commandos are amalgamated this will count towards the British victory conditions as one destroyed unit.

Victory Conditions

Boers
Decisive Victory = Capture Ladysmith and expel the British from Natal
Marginal Victory = Besiege Ladysmith and expel all other British forces from Natal
 
British
Decisive Victory = Achieve initial strategy and reduce Boer fighting ability by destroying 4 or more Commandos
Marginal Victory = Retain Ladysmith and reduce Boer fighting ability by destroying 4 or more Commandos

Any other result is a draw.


Thursday, 28 September 2023

Boer Deployment

The Boers don’t need a choice of strategy as such as their objective is to expel the British from Natal. To achieve this, they need to beat the soldiers of the Queen in battle or out manoeuvre them or both.

Once again, I’m using a D6 to determine the deployment of each command (the Orange Free State Boers are automatically deployed to hex 0105 and General Joubert to Ingogo).

1 = hex 0501
2 = hex 0503
3 = hex 1803
4 = Utrecht
5 = Wool’s Drift
6 = Ingogo

The deployment went like this:

Meyer’s Command – hex 1803
Kock’s Command - Ingogo
Botha’s Command – hex 0501

Quite a decent spread of troops. This means that the initial deployment for both sides is as below.


Next post will be the campaign rules.

Tuesday, 26 September 2023

British Deployment

I’ve written up some basic Campaign Rules, but my intention is for everything to be dice driven as I’m playing this solo. This should limit my ability to bend things too much in favour of the British but we’ll see!

Before we get to troop deployment, I first need a strategy with which I can then frame my orders to the various British commands. So, I’ll start things off with a D6 die roll against the following British Strategy chart:

1 = secure Ladysmith, Harrismith, Newcastle & Dundee
2 = secure Ladysmith, Harrismith & Newcastle
3 = secure Ladysmith, Harrismith & Helpmakaar
4 = secure Ladysmith, Harrismith & Glencoe
5 = secure Ladysmith, Newcastle & Dundee
6 = secure Ladysmith & Dundee

I rolled a 3 so it’s secure Ladysmith, Harrismith and Helpmakaar. An interesting one as it means I’m taking a southerly line of defence but it’s also quite a wide area to defend.

Anyway, now it’s time to deploy with another D6 to determine deployment of each British Brigade (General White is automatically deployed to Ladysmith).

1 = Newcastle
2 = Dundee
3 = Harrismith
4 = Helpmakaar
5 = Ladysmith
6 = Ladysmith

So this is how it went:

Symon's Brigade - Helpmakaar
French's Brigade - Helpmakaar
Yule's Brigade - Dundee
Hamilton's Brigade - Dundee

This is already causing me a serious headache!

Next up will be the Boer deployment.